고민 끝에 GitHub 블로그 시작
다시 시작하는 블로그
만드는 데까지 시간이 많이 소요될까 고민됐지만 그래도 시작이 반이라고 생각하며 바로 시작했다.
하지만 역시나 쉽지 않았다😂 저의 오류들이 도움이 되기를 바라며💪!
깃허브 블로그 한번 만들어봐!
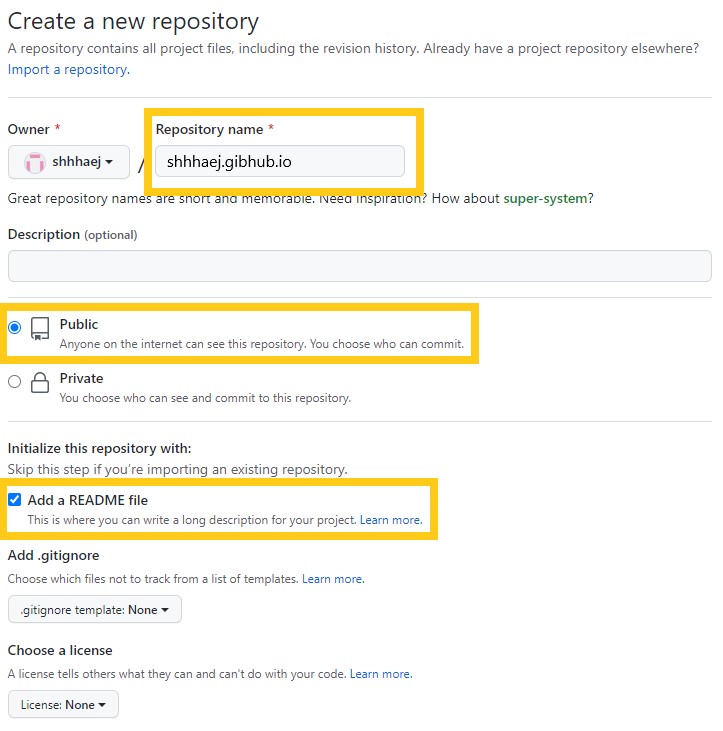
- 새로운 Repository를 만든다.
- Repository 이름을 설정한다.
💡 꼭 username.github.io 이런식으로 만들어 준다.
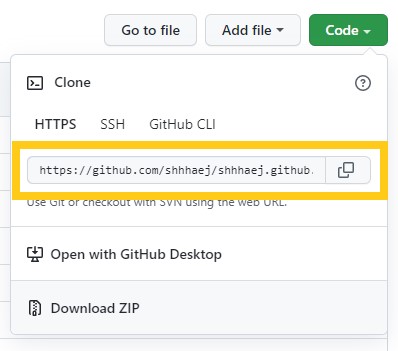
- clone한다.
원하는 경로로 이동한 다음 터미널을 열어 클론한다.
git clone https://… 복사한 주소
- clone한 폴더에 추가로 파일 생성한다.
index.html 파일 생성 (안에 내용은 상관✖️)
터미널에 해당 명령어 입력한다.
echo “Hello World” > index.html
- Push
해당 폴더 모두 Push
터미널에 해당 명령어를 입력한다.
git add
git commit -m “lnitial commit”
git push -u origin main
- GitHub repository 확인
username.github.io repository 확인 시 Push한 파일이 확인 잘 된다면
브라우저 주소창에 username.github.io 입력하면

짜잔
⭐Github 블로그 완성⭐
다 확인되었다면 index.html 파일 제거한다.
Jekyll
- github.io 폴더에 Jekyll을 설치
터미널에 gem install jekyll bundler 명령어를 입력한다.
- Jekyll 생성
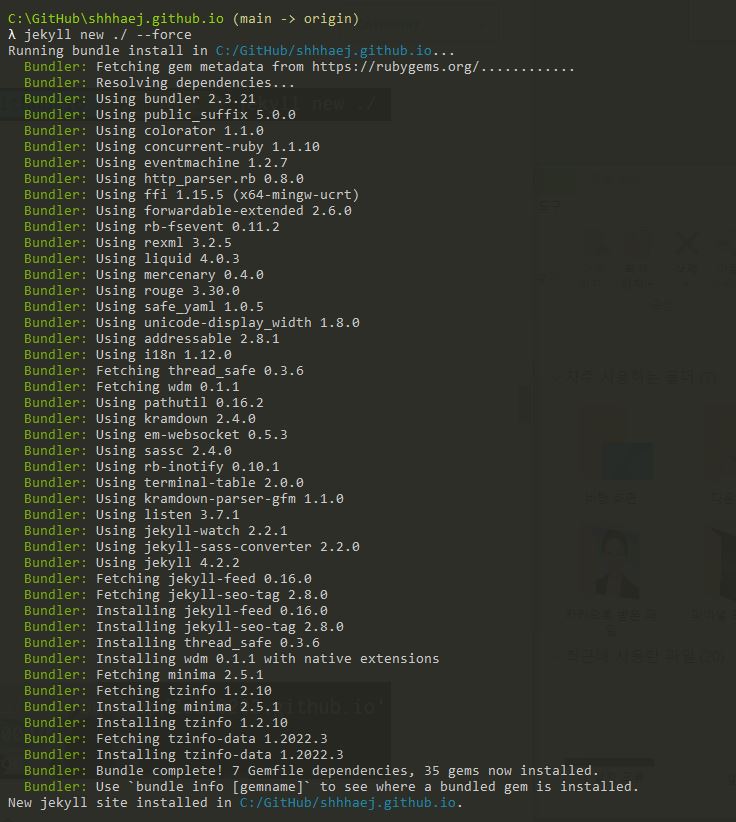
jekyll new ./
명령어를 입력한다.
이때 뚜둥!
Conflict: C:/GitHub/shhhaej.github.io exists and is not empty.
Ensure C:/GitHub/shhhaej.github.io is empty or else try again with ‘- -force’ to proceed and overwrite any files.
오류가 발생되었…🤦
당황하지 말고
jekyll new ./ - -force 를 당당하게 입력한다.
- bundle install
bundle install
위 명령어를 입력한다.
- Jekyll을 로컬서버로 연결하기
bundle exec jekyll serve 를 입력하면 로컬서버가 띄워진다.
단…
또 두둥ㅠㅠㅠ

Jekyll 4.2.2 Please append ‘- -trace’ to be ‘serve’ command for any additional information or backtrace.
bundle add webrick 를 입력하면 오류 해결✨
그럼 다시
bundle exec jekyll serve 를 입력
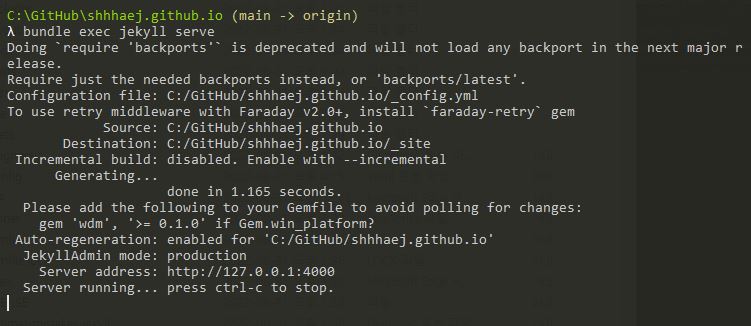
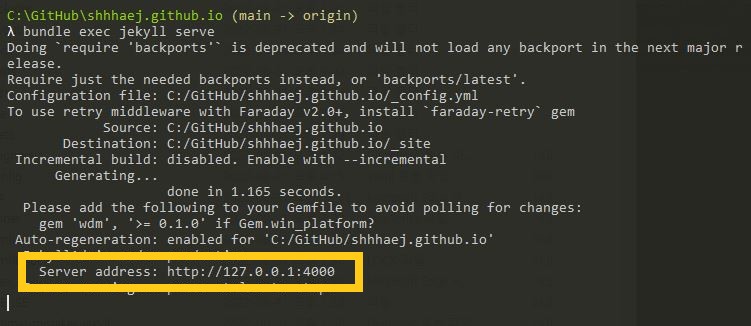
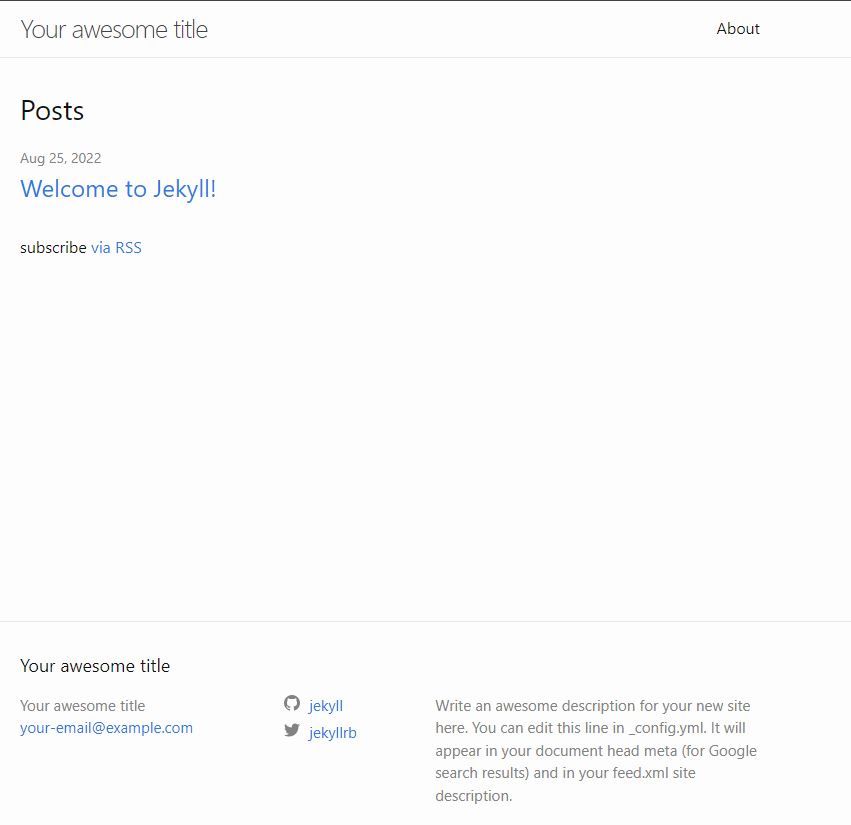
브라우저 주소창에 ‘http://127.0.0.1:4000’ 입력하면..!
요로코롬 잘 나오면 성공 오예오예😆🙌
✔️ 참고로!
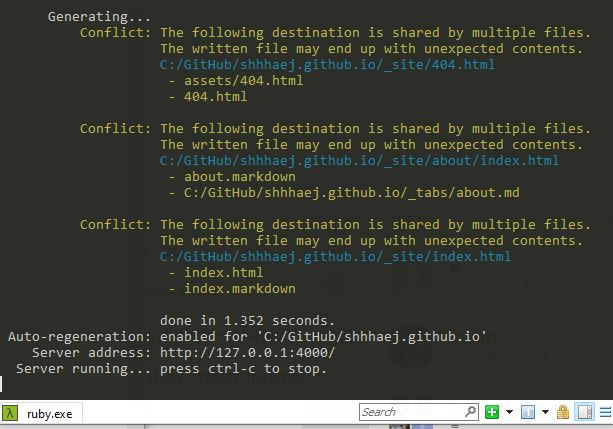
혹시 bundle exec jekyll serve 를 입력 시,
해당 내용이 떴을 경우에는
이건 오류는 아니고 중복된 파일로 주의하란 문구란다.
그래도 신경쓰이니까
404.html
about.markdown
index.markdown
파일을 삭제하면 된다.


Leave a comment